Simple Ways to Improve Jewelry Photography

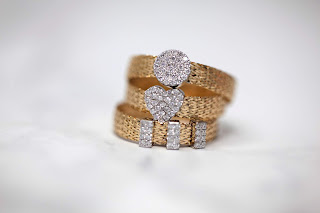
The purpose of Jewelry photography is to sell, to attract as many customers as possible and in order to achieve that, you have to present the best pictures possible. 
So, if you are looking for ways to improve your Jewelry photography and click the most enticing pictures, you can follow some of these tips. 

Jewelry photography guide


Tips to Improve Jewelry Photography

1. Prepare the Jewelry
In order to make preparations for your jewelry photography, you have to clean your jewelry first. Make sure that you make it all nice and shiny. 
2. Pick the Background
Next is to pick the right background. Since it is Jewelry you are photographing, make sure that you use a subtle background so that focus can go your product. 
3. Use a Macro Lens
In order to click a detailed picture of your Jewelry, opt for a Macro Lens instead of a prime lens or standard lens. 
4. Set up a Tripod
To avoid shaky hands or blurry pictures, use a tripod. It will be really handy while doing Jewelry photography or product photography in general. 
5. Right White Balance Setting
One thing that people often forget is to adjust the white balance setting in such a way that your photo looks real rather than too white or too yellow. 


To know more about lighting and editing Jewelry photography pictures, check out -  How to do Jewelry photography?: Everything you should know
Comments

Popular posts from this blog

6 Common Tips To Improve Your Jewellery Photography

If you are looking forward to growing your Jewellery business and making more sales then you must consider Jewellery photography . A Jewellery photo, when clicked right, has the tendency to create an authentic image of your brand. Since there are plenty of Jewellery brands out there, you need to hire the best Jewellery photographer to gain the attention of your potential customers.  Here are some tips you can follow to capture the best Jewellery photos. You will also get an idea about making your Jewellery photography more efficient and productive.  1. Prepare your product 2. Choose the right background 3. Macro lens for macro results 4. Know your white balance And many more.. Read this blog to know more about Jewellery photography . Also Spyne Jewellery photography services to any kind of business. Book Your shoot now. https://www.spyne.ai/product-shoot

Amazing Tips For Product Photography

Product photography has become rather popular due to the Migration of businesses to online platforms. Whether it is for their own website or for any third-party website that lets them do their business, quality visual content is given maximum priority. if you are a business looking for product photoshoot then there is something that you must know before hiring the photographer. Product photography: 2 Things You Must Know Platforms- The first thing that you would want to know is what platform where you are going to listen to your pictures on. Product pictures usually work by attracting the traffic and every platform has its own guidelines. So you can do a little bit of your research and list down the platforms and the kind of pictures that you would need for them. It could be for the website or social media or for content marketing and so much more. Photographer Next, you need to see which Photographer you want to hire. There are a lot of photographers out there but you need to find t...

Best Photo Editing Tips For Beginners - Spyne

Here are some of the best Photo Editing Tips For Beginners . And before we get into it, we here at Spyne would like to give you a bonus tip: You should always shoot in RAW. Not only this gives you much more freedom at the time of Post Production, but it also doesn't let the image lose its quality. So here are some great Photo Editing Tips For Beginners: 1. Adjust The Exposure: In simple words, exposure is the amount of light that is there in your picture. More exposure generally means a brighter image. So as a Photo Editor, you need to first adjust the exposure of the image before you start with anything else.  2. Correct The White Balance: The next important thing after the exposure is the white balance. You need to manipulate this according to the lighting conditions of the image.  3. Sharpening and Noise: As a beginner, you might not be very familiar with these terms, but what they essentially help you with is the look and feel of your image. You have to set both the slid...